In this post, I’m going to walk you through how I wrote a simple UDP server in x86-64 assembly on Linux, using raw syscalls. This is a very low-level example that demonstrates how sockets work without relying on C libraries or higher-level abstractions.
If you’re curious about systems programming or want to understand what’s really happening under the hood, this might help demystify it.
Setting Up: Data and Constants
First, I defined a few constants in the .data section of my assembly code:
- AF_INET (address family): Value is 2.
- SOCK_DGRAM (socket type for UDP): Value is 2.
- IPPROTO_UDP (protocol): Value is 17.
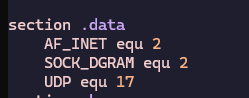
You can find these values in the Linux socket headers socket.h. For example, PF_INET and AF_INET both map to 2. SOCK_DGRAM is 2 because UDP uses datagrams. And the protocol number for UDP is 17.
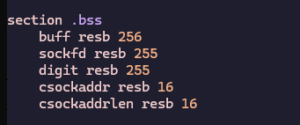
I also reserved space for:
- A buffer to store incoming datagrams (256 bytes).
- A socket file descriptor variable.
- A client sockaddr_in structure for storing client address info when receiving data.
- A length field to hold the size of that client address structure.
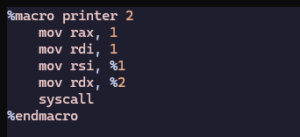
The Print Macro
I created a small macro to print text to stdout. This makes it easy to output logs or received data during testing.
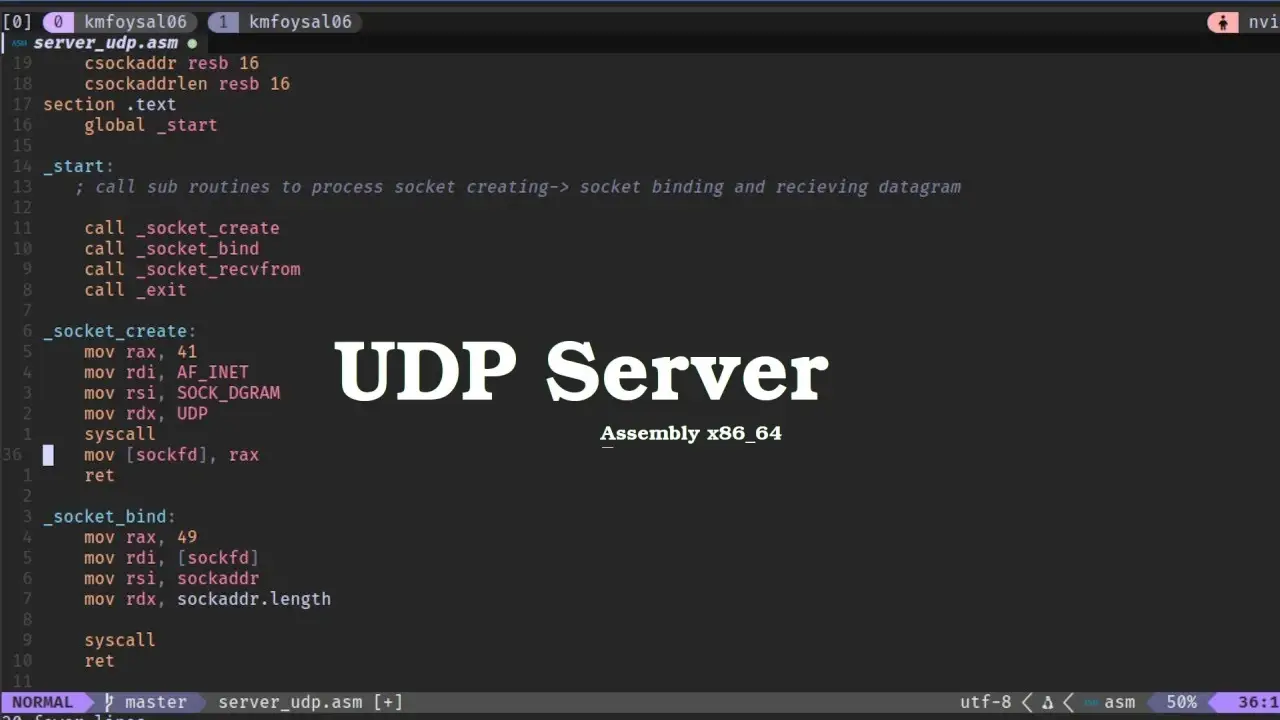
Creating the UDP Socket
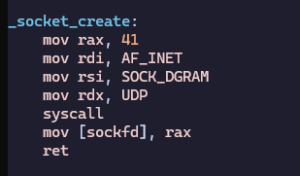
In the main code, I call a subroutine to create the socket. Here’s how it works:
- I use syscall number 41, which is
sys_socket. - It takes three parameters:
- Family: AF_INET (2).
- Type: SOCK_DGRAM (2).
- Protocol: IPPROTO_UDP (17).
If the syscall succeeds, the returned value in RAX is the socket file descriptor (a positive number). If there’s an error, it will be negative. I store this descriptor for use in later calls.
Binding the Socket
Next, I bind the socket to a specific IP address and port:
- I use syscall number 49 (
sys_bind), which also takes three parameters:- Socket file descriptor.
- Pointer to the sockaddr_in structure.
- Size of that structure.
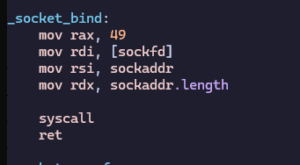
My sockaddr_in structure is defined like this:
- Family: AF_INET (2).
- Port: 8000 (in network byte order).
- Address: 127.0.0.1 (localhost).
- Padding: Zeroed.
If bind returns 0, it means success. A negative value indicates an error.
Receiving Data
Unlike TCP servers, which require listen and accept, UDP servers don’t maintain a connection. After binding, they can immediately receive data.
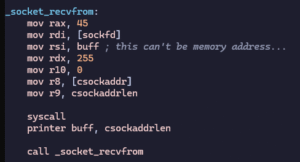
I use sys_recvfrom to receive datagrams:
- Syscall number: 45.
- It takes six parameters:
- Socket file descriptor.
- Buffer to store received data.
- Buffer length (I used 256).
- Flags (set to 0).
- Pointer to client sockaddr (to capture sender’s address).
- Pointer to the length of that structure.
When a client sends data, it lands in the buffer I reserved. The syscall returns the number of bytes received.
Printing Received Messages
After successfully receiving a datagram, I use my print macro to output the contents of the buffer to the console.
I then recursively call the receive routine so the server can keep listening for more datagrams in a loop without exiting.
Testing the Server
now lets test the server is working or not
- Compile the assembly source to a 64-bit executable.
- Run it in a debugger with
strace -e trace=networkto see the syscalls in action. - Verify that the server is listening on localhost:8000.
- Send a UDP datagram to the server from a client, watching the server print the received message.


It successfully printed things like:

hi
showing the receive and print loop was working.
Conclusion
This is a minimal but fully working UDP server written entirely in assembly with Linux syscalls.
While you’d typically write real-world servers in C or another higher-level language, doing it this way is a great exercise for understanding how socket programming really works at the lowest level.
If you want to try it yourself, you’ll find the full code linked in the video description.
Final Thoughts
Assembly isn’t the easiest way to write network code, but it’s incredibly educational. By manually setting up the syscalls and structures, you see exactly what the operating system expects—and how things like sockets, buffers, and address structures really work.
If you’re learning systems programming, Linux internals, or networking, I highly recommend trying out something like this yourself!
Thanks for reading!
If you have questions, feel free to drop them in the comments.